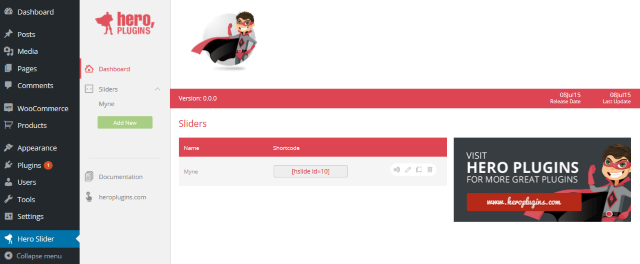
Once Hero Slider has been activated, browse to Hero Slider from your WordPress admin dashboard. This will take you to the Hero Slider dashboard. The dashboard will provide you with an easy view of all sliders currently on your website, along with their short-codes, and you can use the controls to rename, edit, duplicate or delete a slider.
To create a new slider, click on the ‘Add New’ button – then enter the name for your slider in the text box that opens below and click ‘Add’.
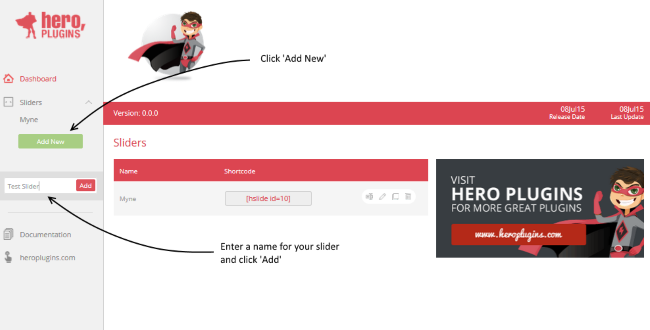
Once you click ‘Add’, your new slider is created, and you will automatically be redirected to the General Setup tab for your slider.
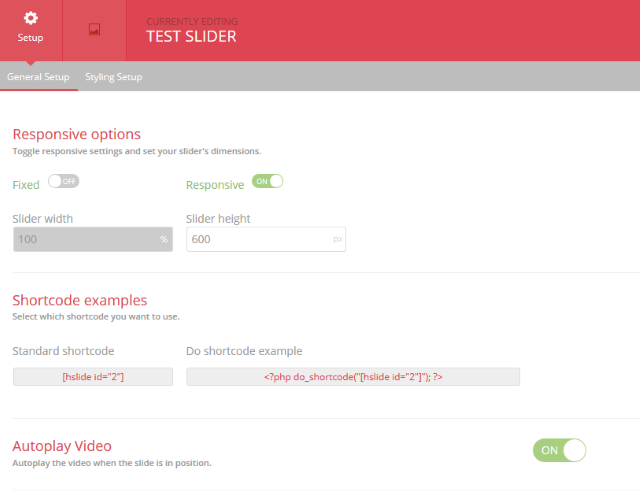
The options on this tab will allow you to specify whether you would like your slider to be responsive or fixed-width, and to set the dimensions for your slider (in px). The Autoplay Video option, which can be switched on or off, controls whether any videos included on your slides automatically start playing once the slide has finished loading. Please note that this setting is universal to this particular slider, and will affect any videos added to your slides.
Finally, you will find your short-code snippets for your slider, which you can copy and paste to your page, or implement directly to your template files.
The next available tab is the Styling Setup tab, which adjusts the overall appearance of your slider as well as its navigational elements. For the purposes of the Quick Start however, we will proceed with the default settings – we will cover this section in more detail in the full documentation.