All elements added to your slides already have a default animation, and will slide into view from the left as your slide loads. It is, however, possible to change the animation directions and timing of your elements, and to do this you will need to scroll down to the Element Animation Control section of the slide’s settings page.
All of the elements currently added to your slide will be listed in that section by their z-index in descending order. To make changes to the animation settings of an element, simply click on the edit control, as pictured below:

The animation settings for that particular panel will then slide open, containing the various animation types and styles, as well as the settings for timing of the animation, and the animation timeline. It should be noted that the animation settings are the same regardless of the type of element you are making changes to:
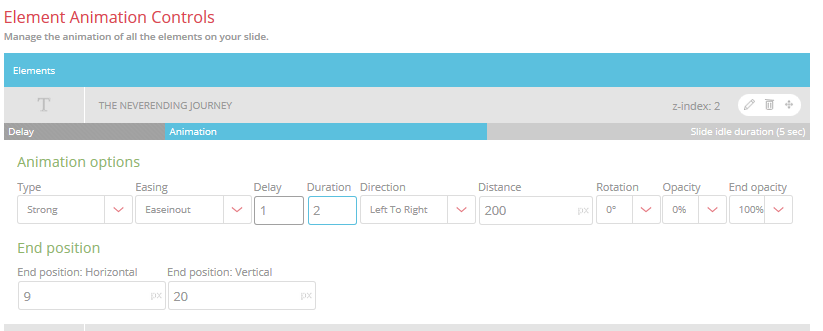
Immediately above the settings is your animation timeline, which consists of three sections –
- Initial delay – the delay between your slides initial load and the element animation starting (in the example above, 1 second)
- Animation – the duration of the animation for that specific element (in the example above, 2 seconds)
- Idle time – the remainder of the slides idle time during which no additional animation takes place for this element (2 seconds in the above example)
Please note that the Slide Idle Duration showing in the example above is the entire idle duration for the slide before transitioning to the next slide in your series – this is adjusted by selecting your slide idle interval in the Slide Idle Time dropdown at the top of the settings for your slide. Below is an example of an animation timeline for a slide with a 10-second idle time (Animation and animation delay times are still 2 seconds and 1 second, respectively).

The final setting available on the panel is your End Position which is used to specify where the element rests when its animation completes. While this can be specified manually by changing the values in the text boxes, you can also adjust this by dragging the element to the desired location on your canvas.