CONTENTS:
Add a map marker
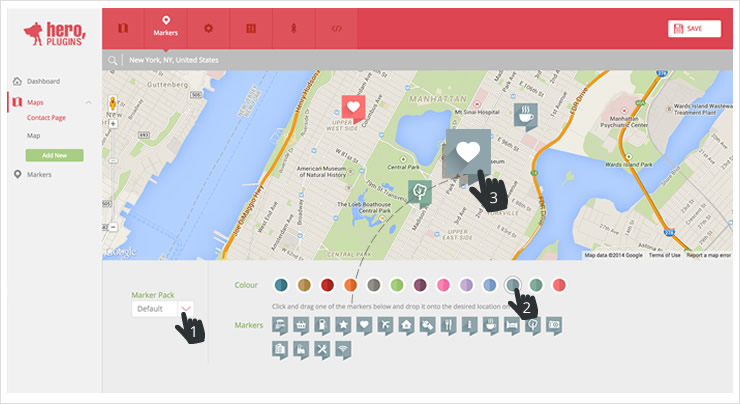
With your map selected navigate to the Markers tab, you have the ability to add, remove and edit markers for your map.
If you have additional Marker Packs installed, you can use the Marker Pack dropdown to select the pack you want to use. Please note that color selection is not supported for Custom Marker Packs.
To add a marker, first select your color, click-and-drag your chosen marker onto the map to your desired location.

Note: Pick your color before adding your marker to the map. Changing the color retroactively will not update markers already added to the map. This enables you to use more than one color for your markers.
Edit a map marker
By default, markers added to the map contain no additional information, and will simply zoom in when a user clicks on them.
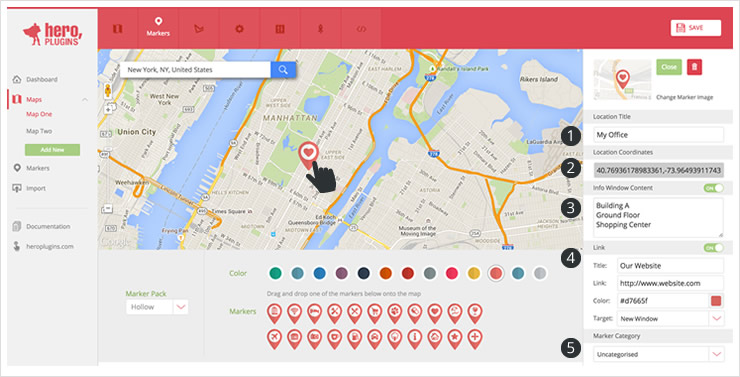
In order to add additional information to your markers, simply click on the marker you wish to edit – the edit panel will appear on the right-hand side of your screen. This panel contains a number of fields and options:

- Your Location Title
- Location coordinates – which updates automatically when you move your marker
- Info Window Text – this option can be switched on/off and is off by default. Any additional text for the infobox is entered here
- Website link, formatting and behavior – this option is off by default and contains the following settings/fields
- Title – your anchor text
- Link – your target URL
- Color – enter the HEX value or use the color picker tool
- Target – set your link to open in the same window or a new tab
- Marker Category – select your marker’s category if you have set up categories
Once the information has been added/edited to your satisfaction, click on the Done button to close the panel.
Note: It is important to click the Save button (top right) to save your work – the Done button will not save your information.
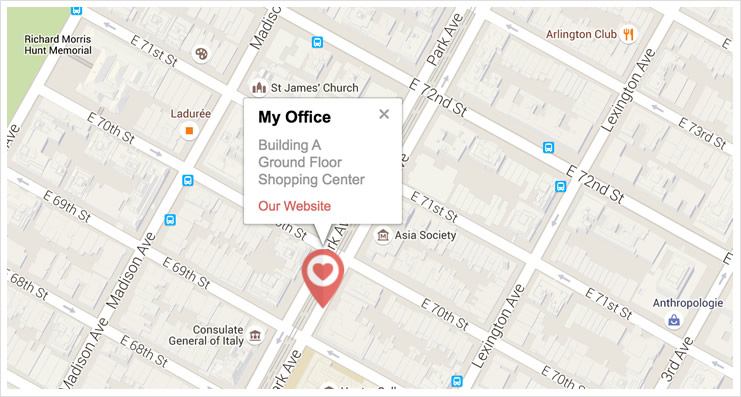
Result below:

Delete a map marker
To delete a marker you added to the map, simply click on the trash bin icon 🗑️ in the top-right corner of the panel.