CONTENTS:
Adding and formatting custom lines (Polylines) on your map
Adding and formatting simple shapes on your map
Hero Maps includes the ability to add basic shapes and lines to your maps to display additional information. The four available shapes are:
- Polylines
- Circles
- Polygons
- Rectangles
When you are on the shapes page, you will see the tools for adding shapes and lines to your map at the bottom of your map screen.
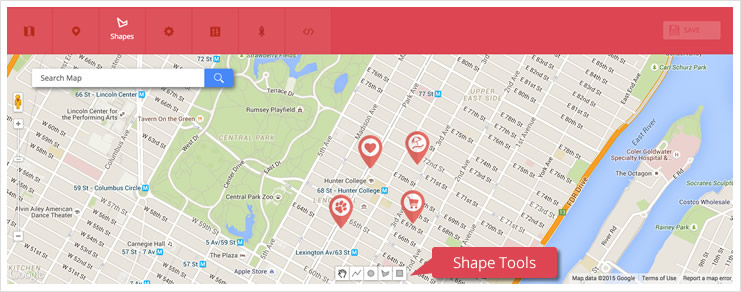
Adding and formatting custom lines (Polylines) on your map
Four options are available to adjust the appearance of your line. You should set these before adding your line to the map since changes made afterwards will not affect shapes already added to the map.
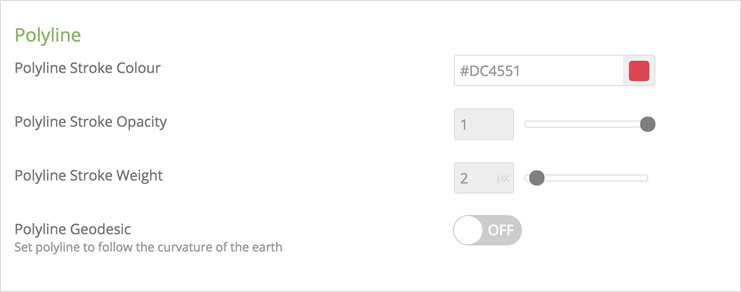
Stroke color – sets the line color. Set your color by using the color picker tool, or entering the HEX value of your color.
Stroke opacity – sets the opacity. Values include 0.1 (nearly transparent) to 1.0 (fully opaque)
Stroke weight – affects the thickness of your lines.
Polyline Geodesic – sets your polyline to follow the curvature of the Earth
To add your line, click the Line Tool, and then click on the point of the map where you would like your line to start. You can then move your mouse cursor to the next location where you will either:
- Click twice to set your second point and complete the line, or
- Click once to set your second point and continue to a third point. Click on the final point twice to complete your line
Once you have set your lines, click on the hand tool to drag the map around freely.
Each line has handles – which appear as semi-transparent points on the line – which you can use to manipulate the line. To do this, hover your cursor over the point, then click and drag the point to alter the curvature of the line.
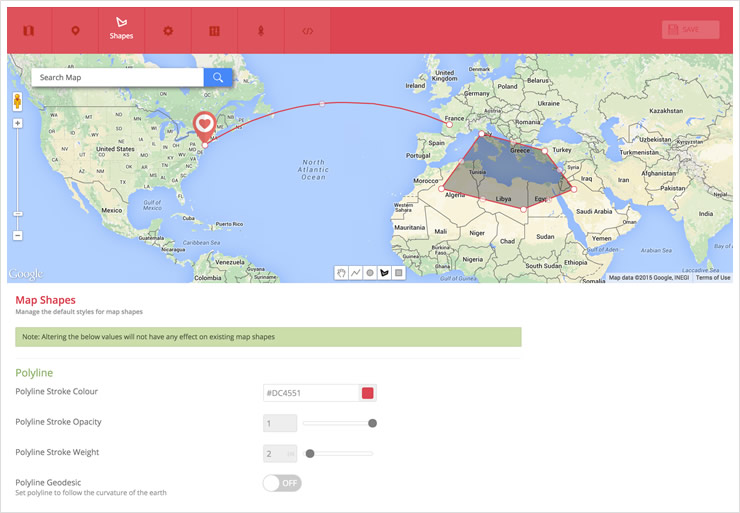
You can format lines already added to your map by clicking on the line – an edit box will slide out from the right, containing the same settings used when creating the line. You can alter them here, and the line will change on the map as you make your changes. If you would like to delete the line, click on the trash bin icon in the top-right corner.
Adding and formatting simple shapes on your map
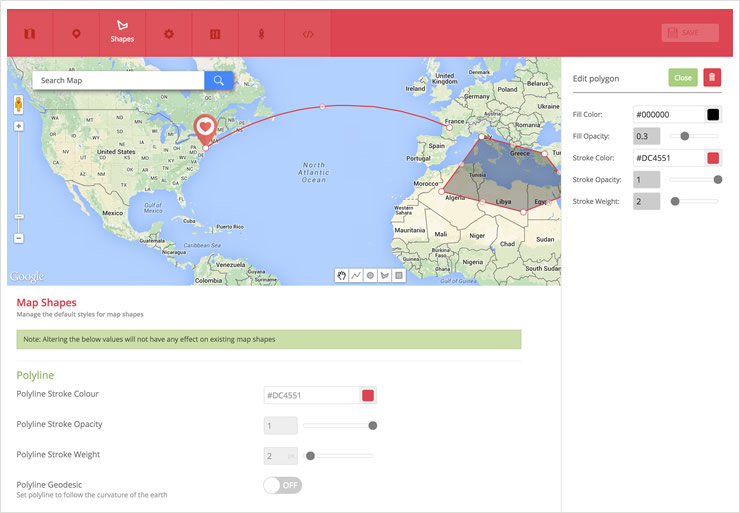
As with the polyline example above, settings for the appearance of your shape need to be set before adding your shape to the map, although clicking on the shape will open the edit box which will allow you to edit shapes already added to the map.
Each shape section contains five options that adjust the appearance of your shape:
Fill color – the color for the interior fill of the shape
Fill opacity – adjusts the transparency of the fill from 0 (completely transparent) to 1 (completely opaque)
Stroke color – sets the color for the outline of your shape
Stroke opacity – adjusts the transparency of the outline of your shape from 0.1 (nearly transparent) to 1 (completely opaque)
Stroke weight – adjusts the thickness of the outline of your shape
In order to draw the circle and rectangle, position your cursor, then click and drag. Release the mouse button to complete your shape. These shapes can be resized by selecting the hand tool, hovering your cursor over one of the handles (or points) on the shape, and by clicking and dragging.
You can reposition the shape by positioning your cursor anywhere within the shape, and by clicking and dragging, and releasing the left mouse button when you are satisfied with the positioning.
In order to draw a polygon shape, position your cursor, and then click to add each of the points that represent a corner. Clicking on the first point you placed will complete the shape. You can reshape and resize the shape by hovering over any of the handles, and clicking and dragging it to a new position on the map – please ensure that you have selected the hand tool before attempting this.
You can reposition the shape by positioning your cursor anywhere within the shape, and by clicking and dragging, and releasing the left mouse button when you are satisfied with the positioning.
Below is an example map containing each of the three shapes:
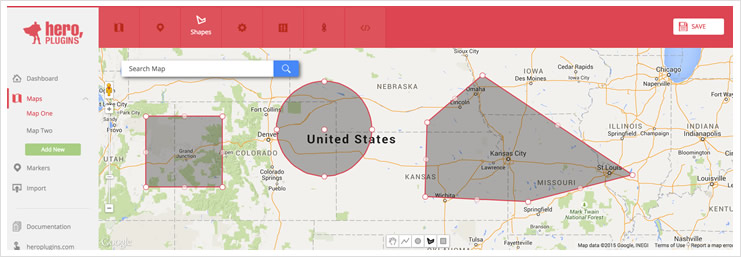
To change the appearance of a specific shape, click anywhere within the shape – the edit box will slide out from the right, and you can adjust the settings – the shape will update on the map as you make changes. To delete your shape, click on the trash bin icon (top right corner). For an example, see the Polyline section above.
These shapes are useful when you would like to indicate things like service delivery area, or directions.
Setting a shape drop delay
You can set the delay (in ms) between the map load and the appearance of shapes placed on the map.
To do this, select the desired map and navigate to the Advanced Settings Tab.

Scroll down to the Shapes section and here you can insert your desired delay timing (in ms).
