To add a WooCommerce product or category to your menu begin with first ensuring the following;
- The WooCommerce plugin has been installed and activated.
- You have created the relevant categories from the 'Products > Categories' page
- You have created and published a product and that this product has been assigned to the relevant category.
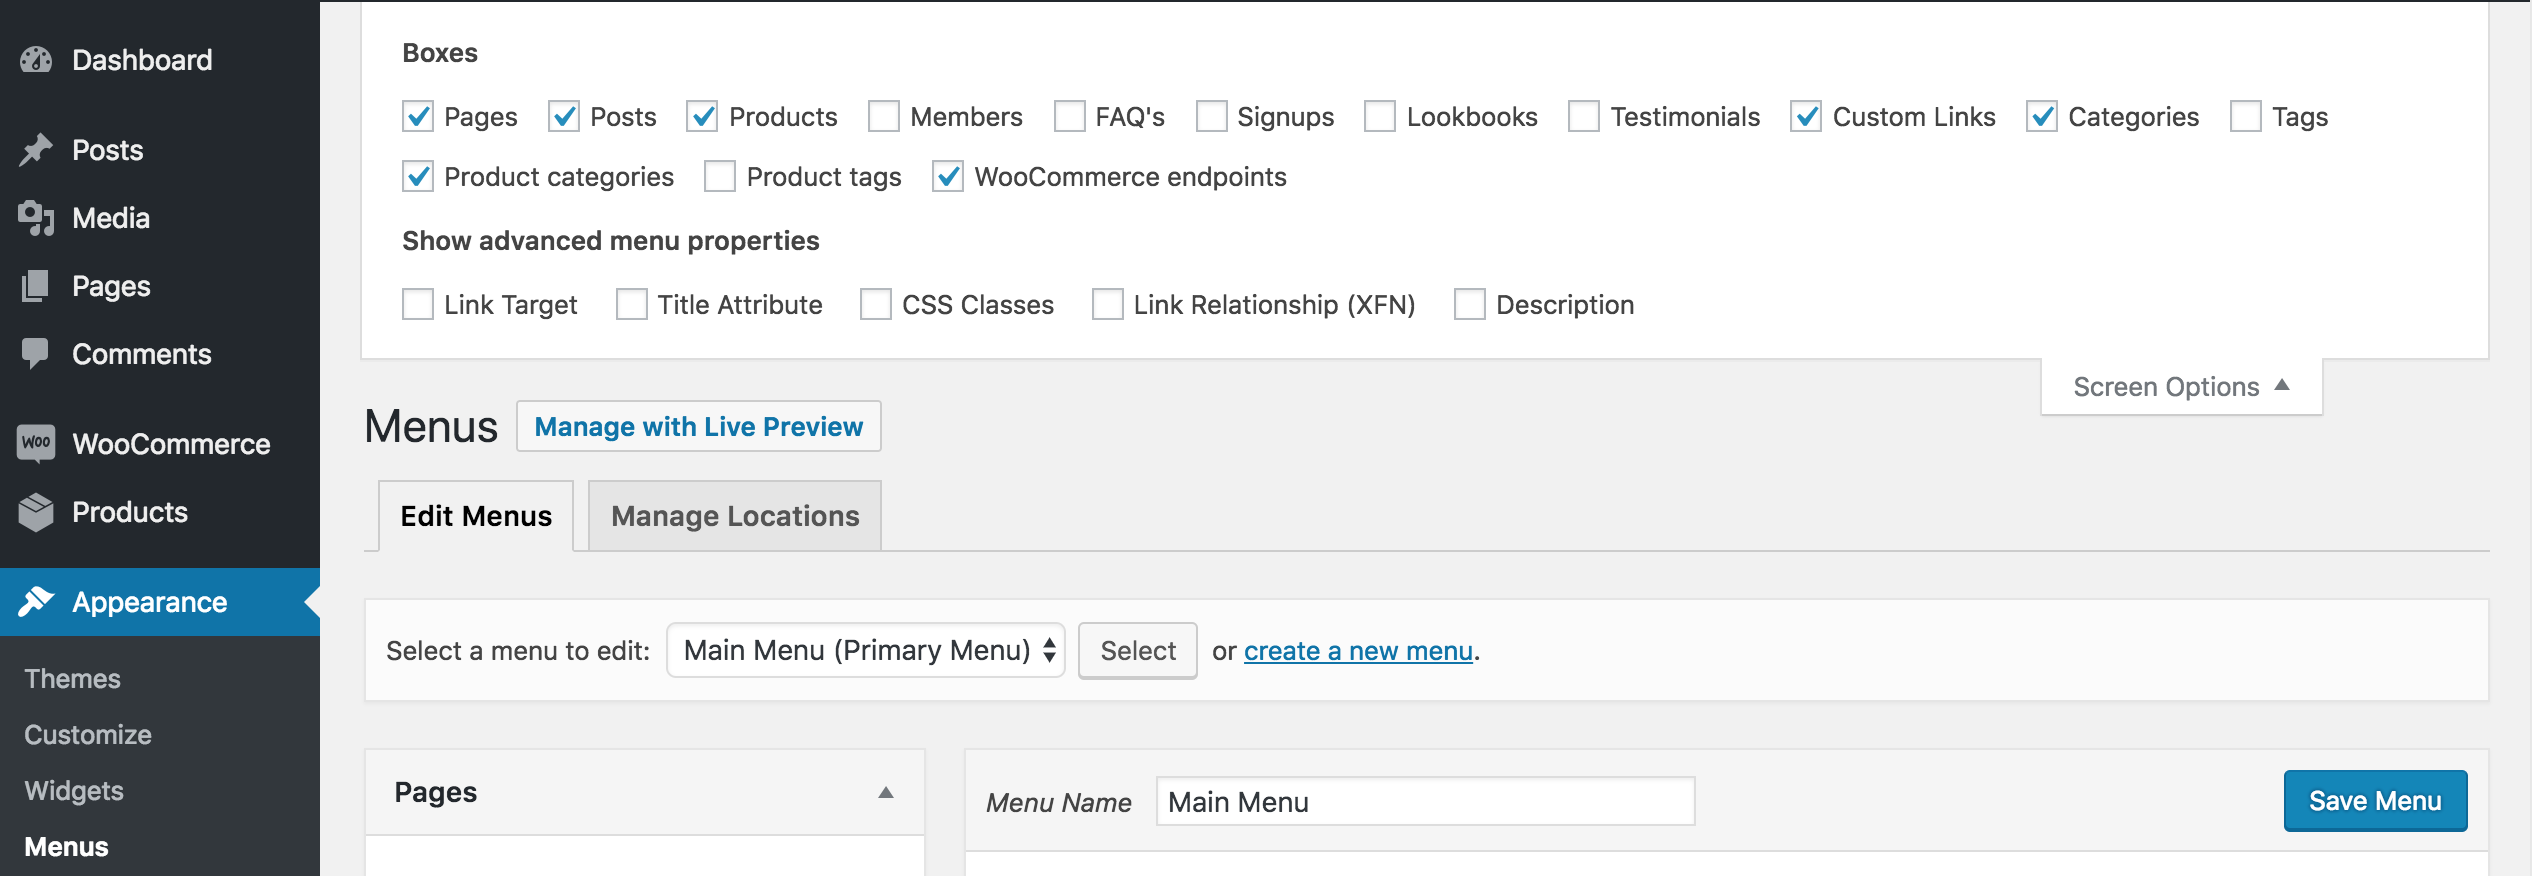
The first step is to ensure that WooCommerce products and categories have been enabled for use in the menu. This can be done on the 'Appearance > Menus' page by opening the 'Screen Options' tab at the top right of the page.

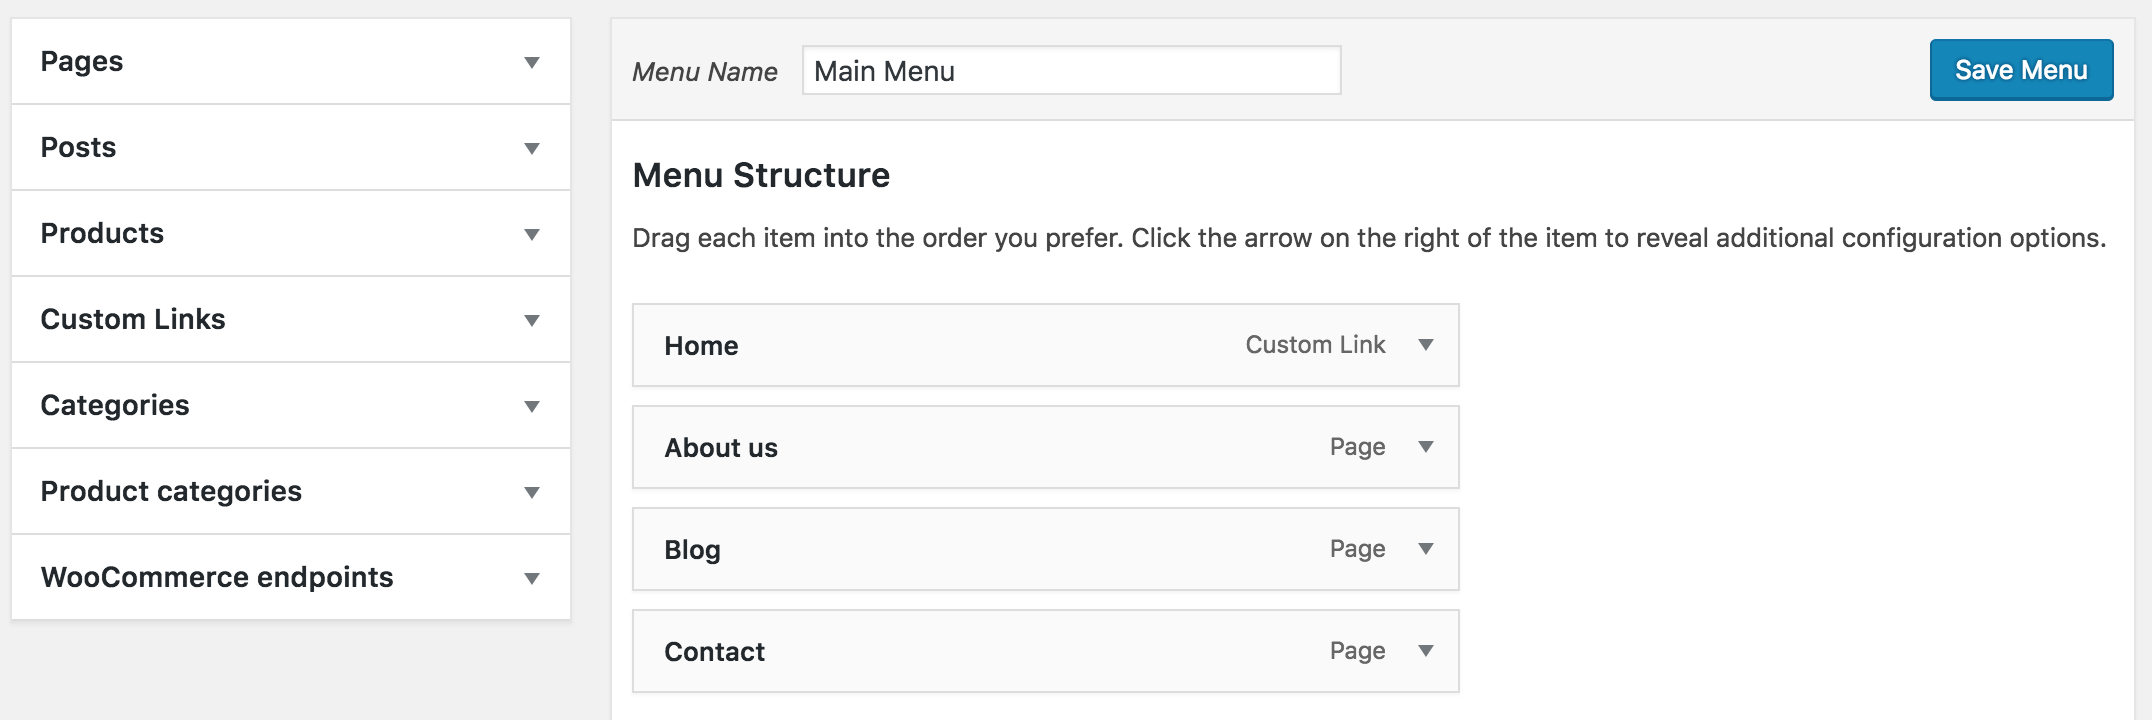
Once the 'Products' and 'Products categories' options are enabled these sections will be added to the left hand accordion menu.

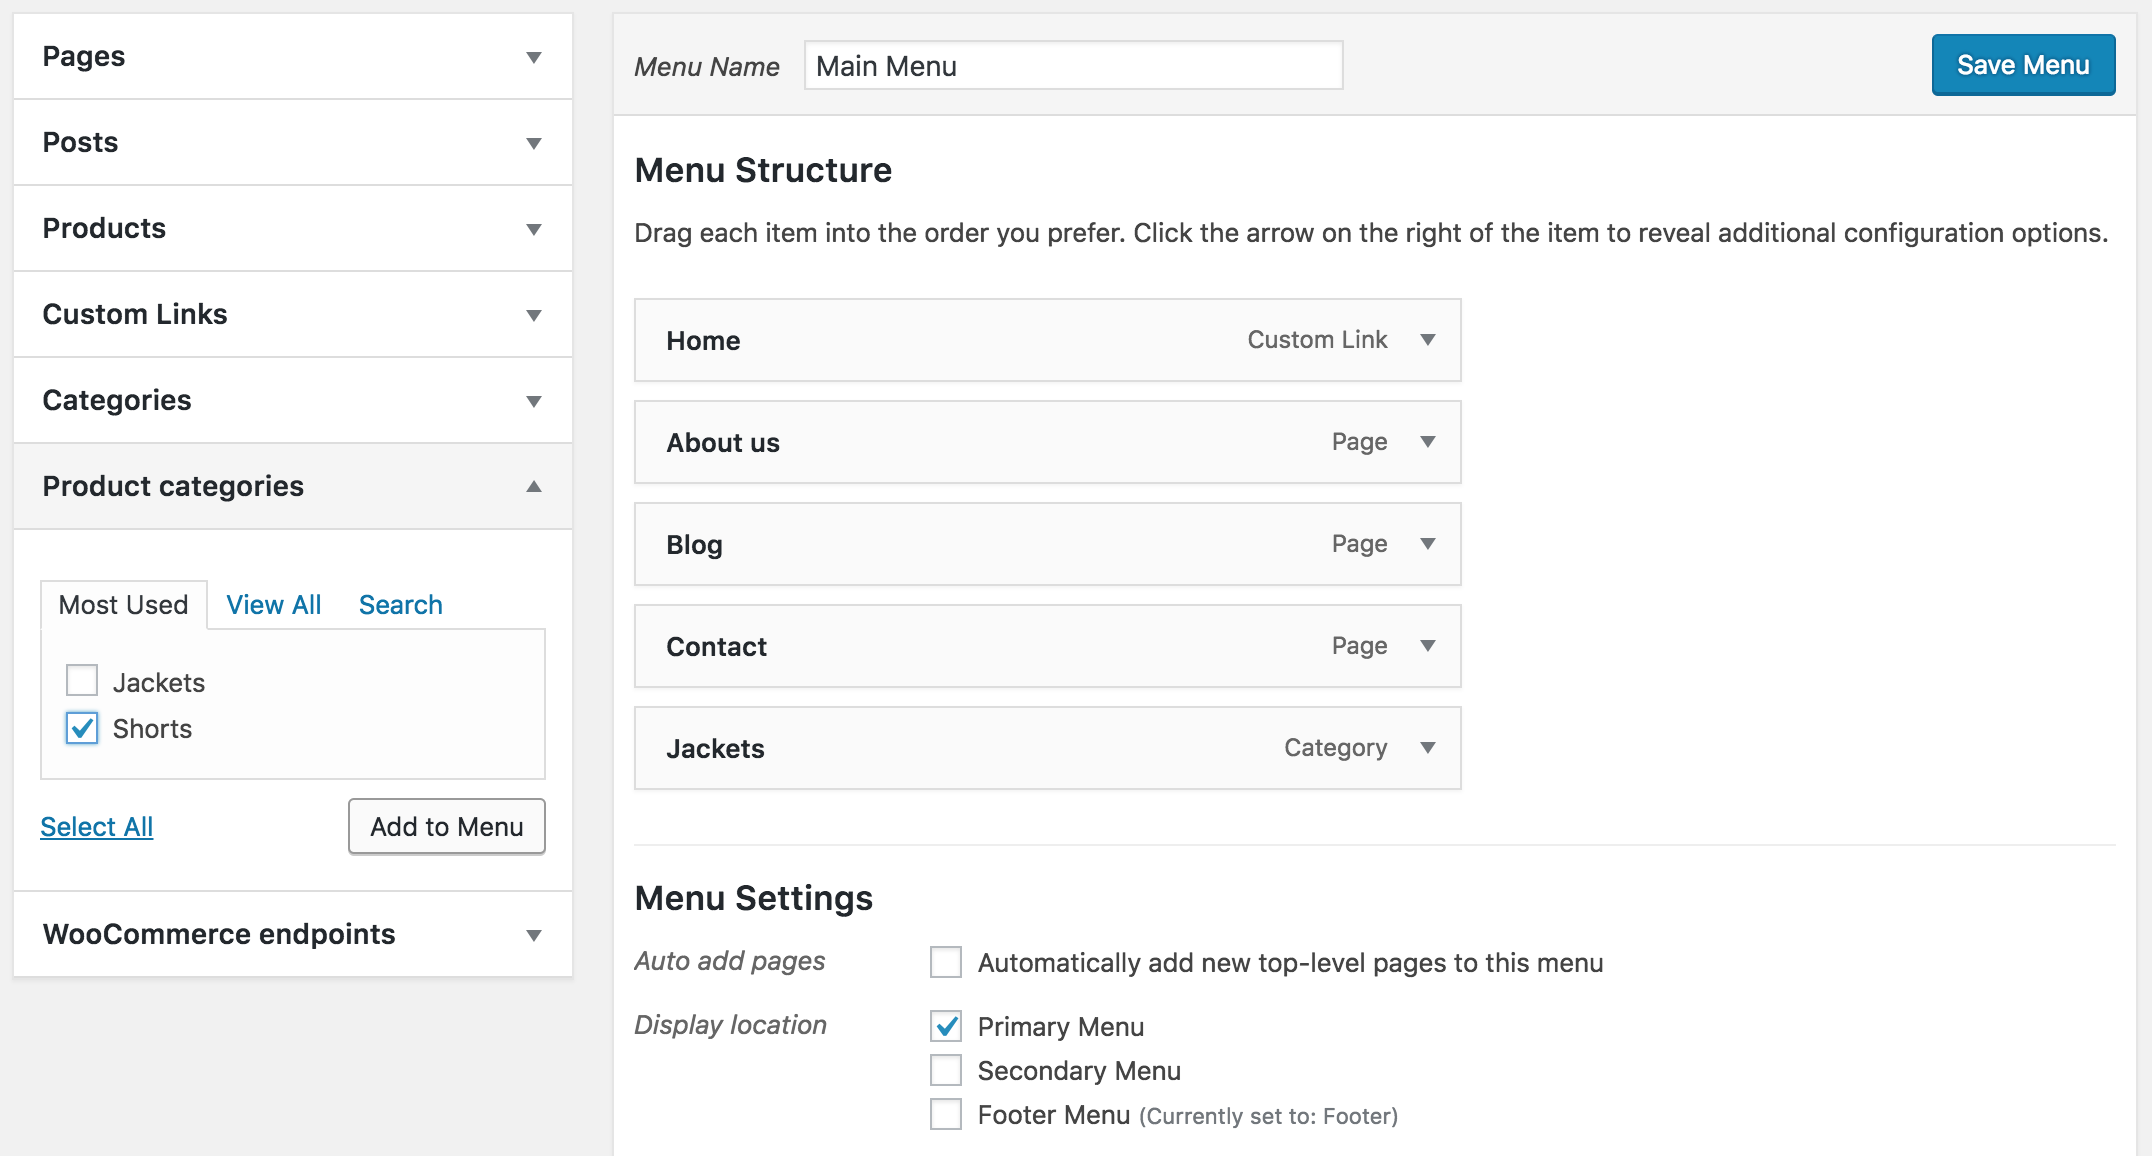
You can then open the required accordion section to view the list of available items. Note that by default the 'Most Used' tab is displayed first and if you are not seeing the element you are looking for you can switch to the 'View All' tab to see the full list of available elements. An element can then be added to the menu by selecting the checkbox next to the title and then clicking the 'Add to Menu' button.

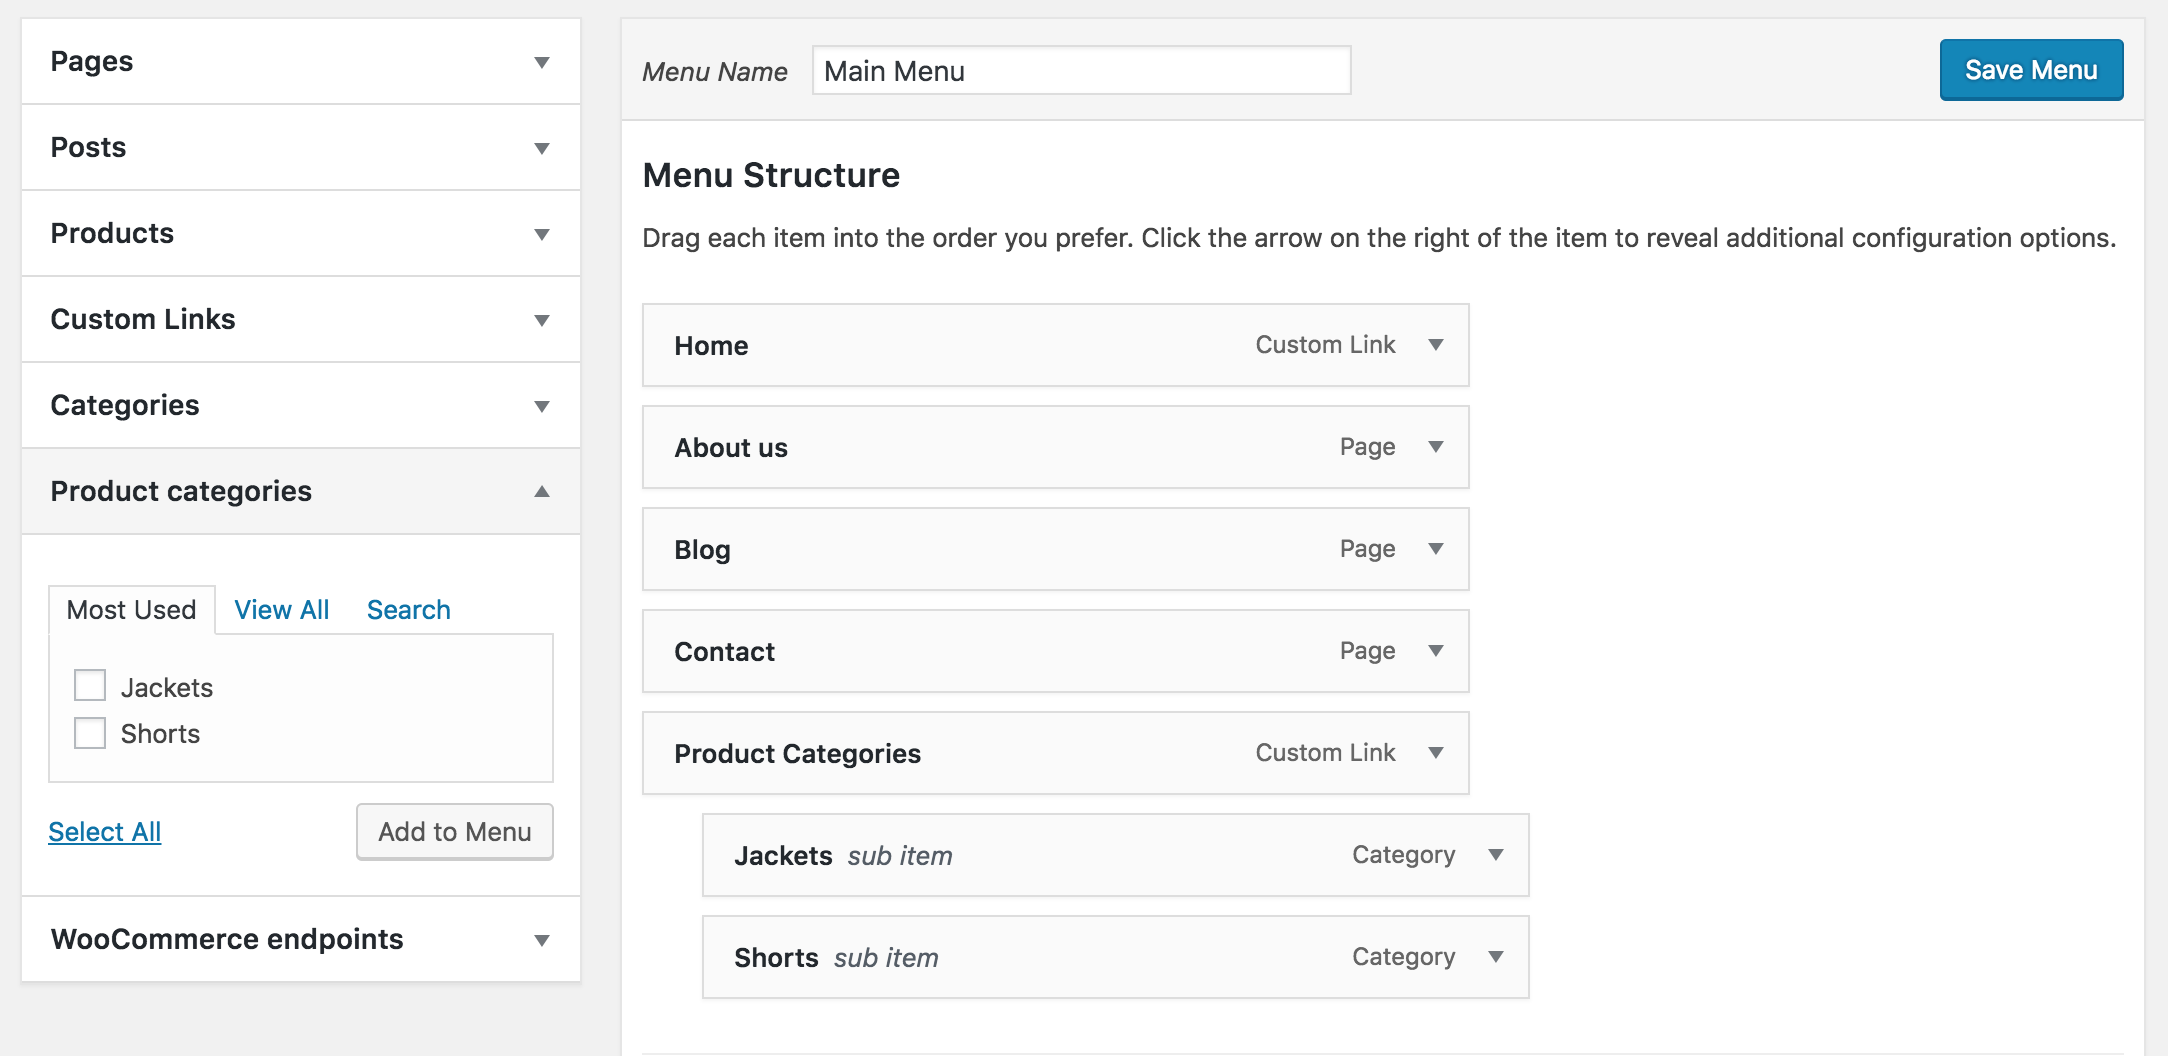
Elements can be dragged to re-arrange the menu structure and nested to create drop-down menus. In the bellow example a custom link has been added named 'Product Categories' to act as a parent link where the product categories 'Jackets' and 'Shorts' form the drop-down.
