CONTENTS
Multilanguage Translations using WPML (Premium)
Single Language Translation using Loco Translate (Free)
Multilanguage Translations using WPML
InVogue is fully compatible with the WPML plugin! WPML can be used to create a multilingual site and translate your sites content into multiple different languages.
WPML is not bundled with the theme so will need to be purchased separately, you can purchase WPML directly from within inVogue by navigating to the inVogue Settings → WPML tab:
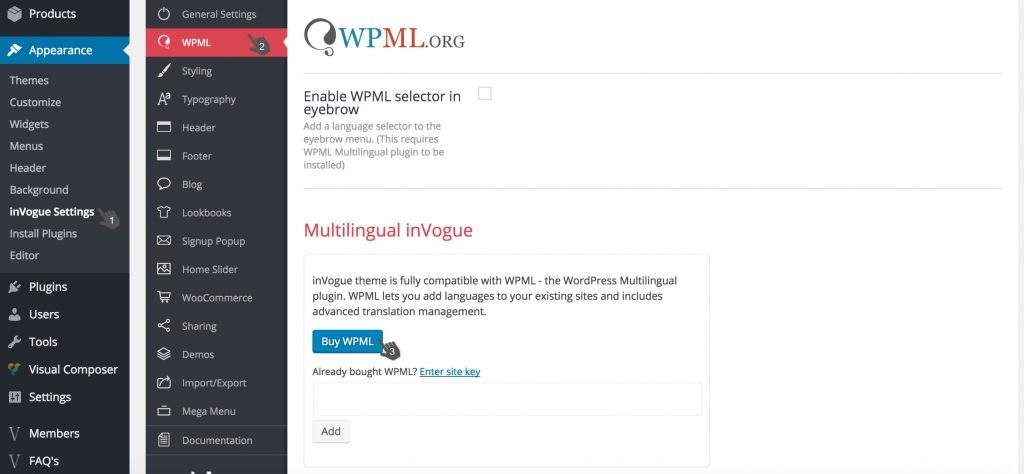
Or by navigating to this link:
Once purchased your WPML license key can be added in the inVogue Settings → WPML tab.
You’ll need to then fully install and activate the WPML plugin through your WordPress admin area. You can do this from the Plugins page, please ensure you’ve installed and activated the WPML core plugins (WPML Multilingual CMS, WPML String Translation, WPML Translation Management) before activating any other plugins that might depend on them.
Getting Started with WPML
Once the plugins are all installed you can begin configuring WPML for translation to the required languages. Please take a look at the WPML starter guide here: https://wpml.org/documentation/getting-started-guide/
To begin translating the content of your pages and posts you’ll need to edit each page and post and create duplicates which are then ready to be translated. WPML will help by maintaining your link structure across duplicates to makes sure the translated content is displayed when users switch between site languages.
Within inVogue if there are any specific pieces of text which don’t fall under the content of a page or post such as buttons or extra bits of text you’ll be able to use WPML String Translation to also update these sections.
Single Language Translation using Loco Translate
Loco Translate is a free WordPress plugin that offers website owners a simple way of translating theme and plugin files directly from the WordPress dashboard. It also comes with localization tools for extracting strings and generating templates.
Getting Started with Loco Translate
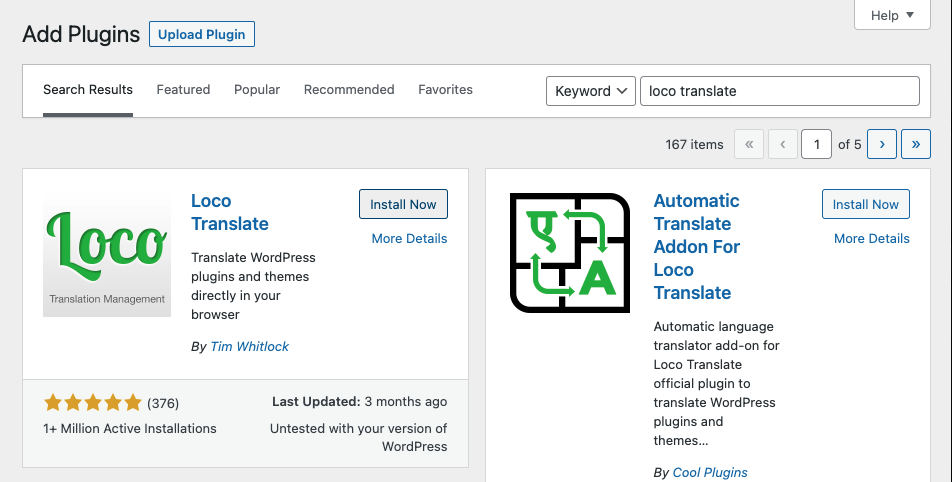
First, navigate to Plugins → Add New and search for the plugin Loco Translate. Click on the Install Now button.
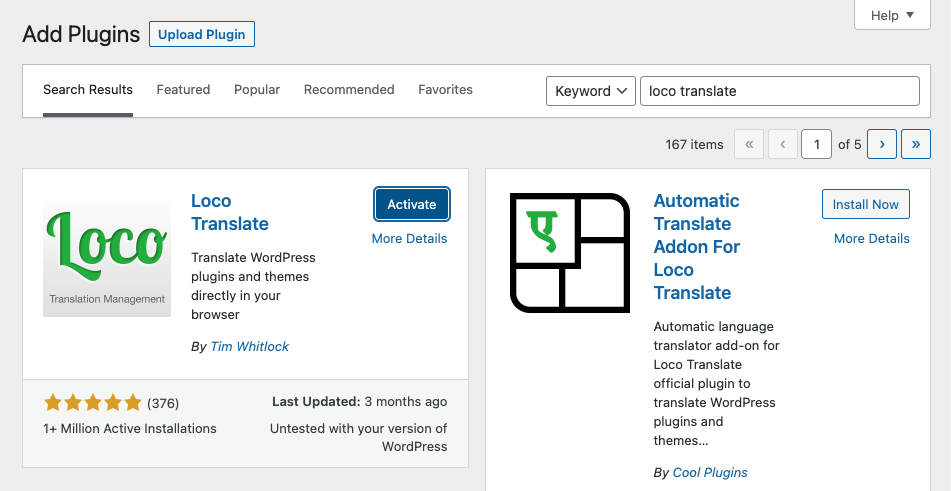
Once installed, click on the Activate button. When this is complete, you will see a new WordPress dashboard menu item labelled Loco Translate.
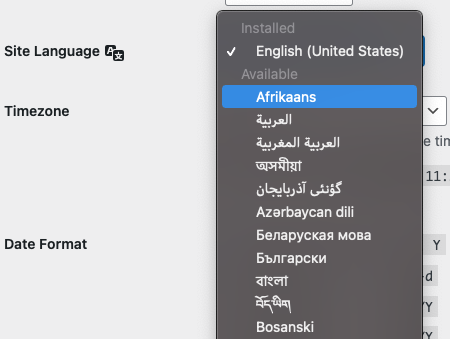
This next step can be done now or as the last step. Navigate to WP Dashboard → Settings → General → and scroll down to change your Site Language to the language you'll be translating your theme into. The language you see at the top of the dropdown menu is the language your site is currently set at. inVogue's default language is English. Be sure to click the save button.
Navigate to WP Dashboard → Loco Translate. At the top will be a heading that says Active theme. Beneath, you should see your inVogue theme name. Click on the hyperlinked theme name.

On the next screen, below the inVogue title, click the New Language option.

Next, select the language from the dropdown list that you want to translate the theme into under WordPress Language. Below, under Choose a location, we recommend selecting Custom Location. You should select this so your new translations are safe from automatic updates. When finished, click the Start translating button.
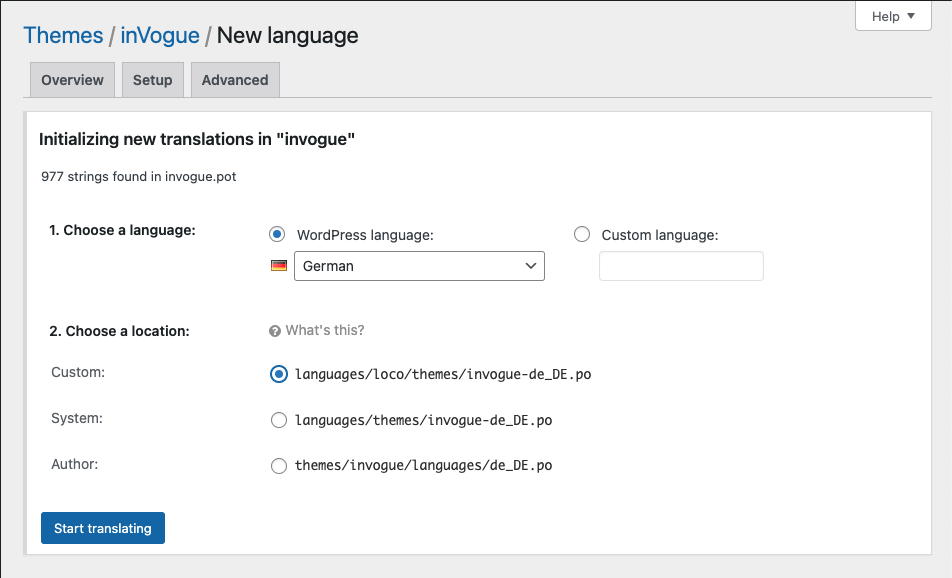
Once on the editor screen, you'll see all the strings the theme has defined in its template file. Untranslated strings are shown in bold blue. To start with they will all be untranslated.
Select the English string at the top and enter your translation in the pane at the bottom.
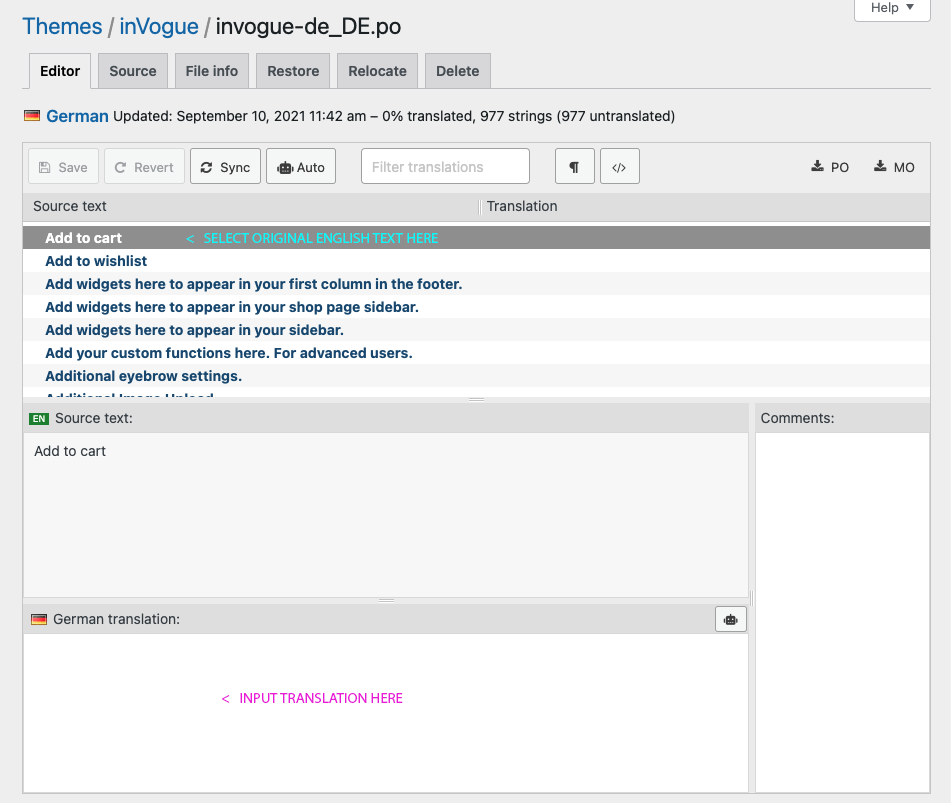
Translate as many strings as you like and when you're ready click the Save icon in the editor toolbar.
For more in-depth tutorials on how to use Loco Translate see their help documentation here:
https://localise.biz/wordpress/plugin