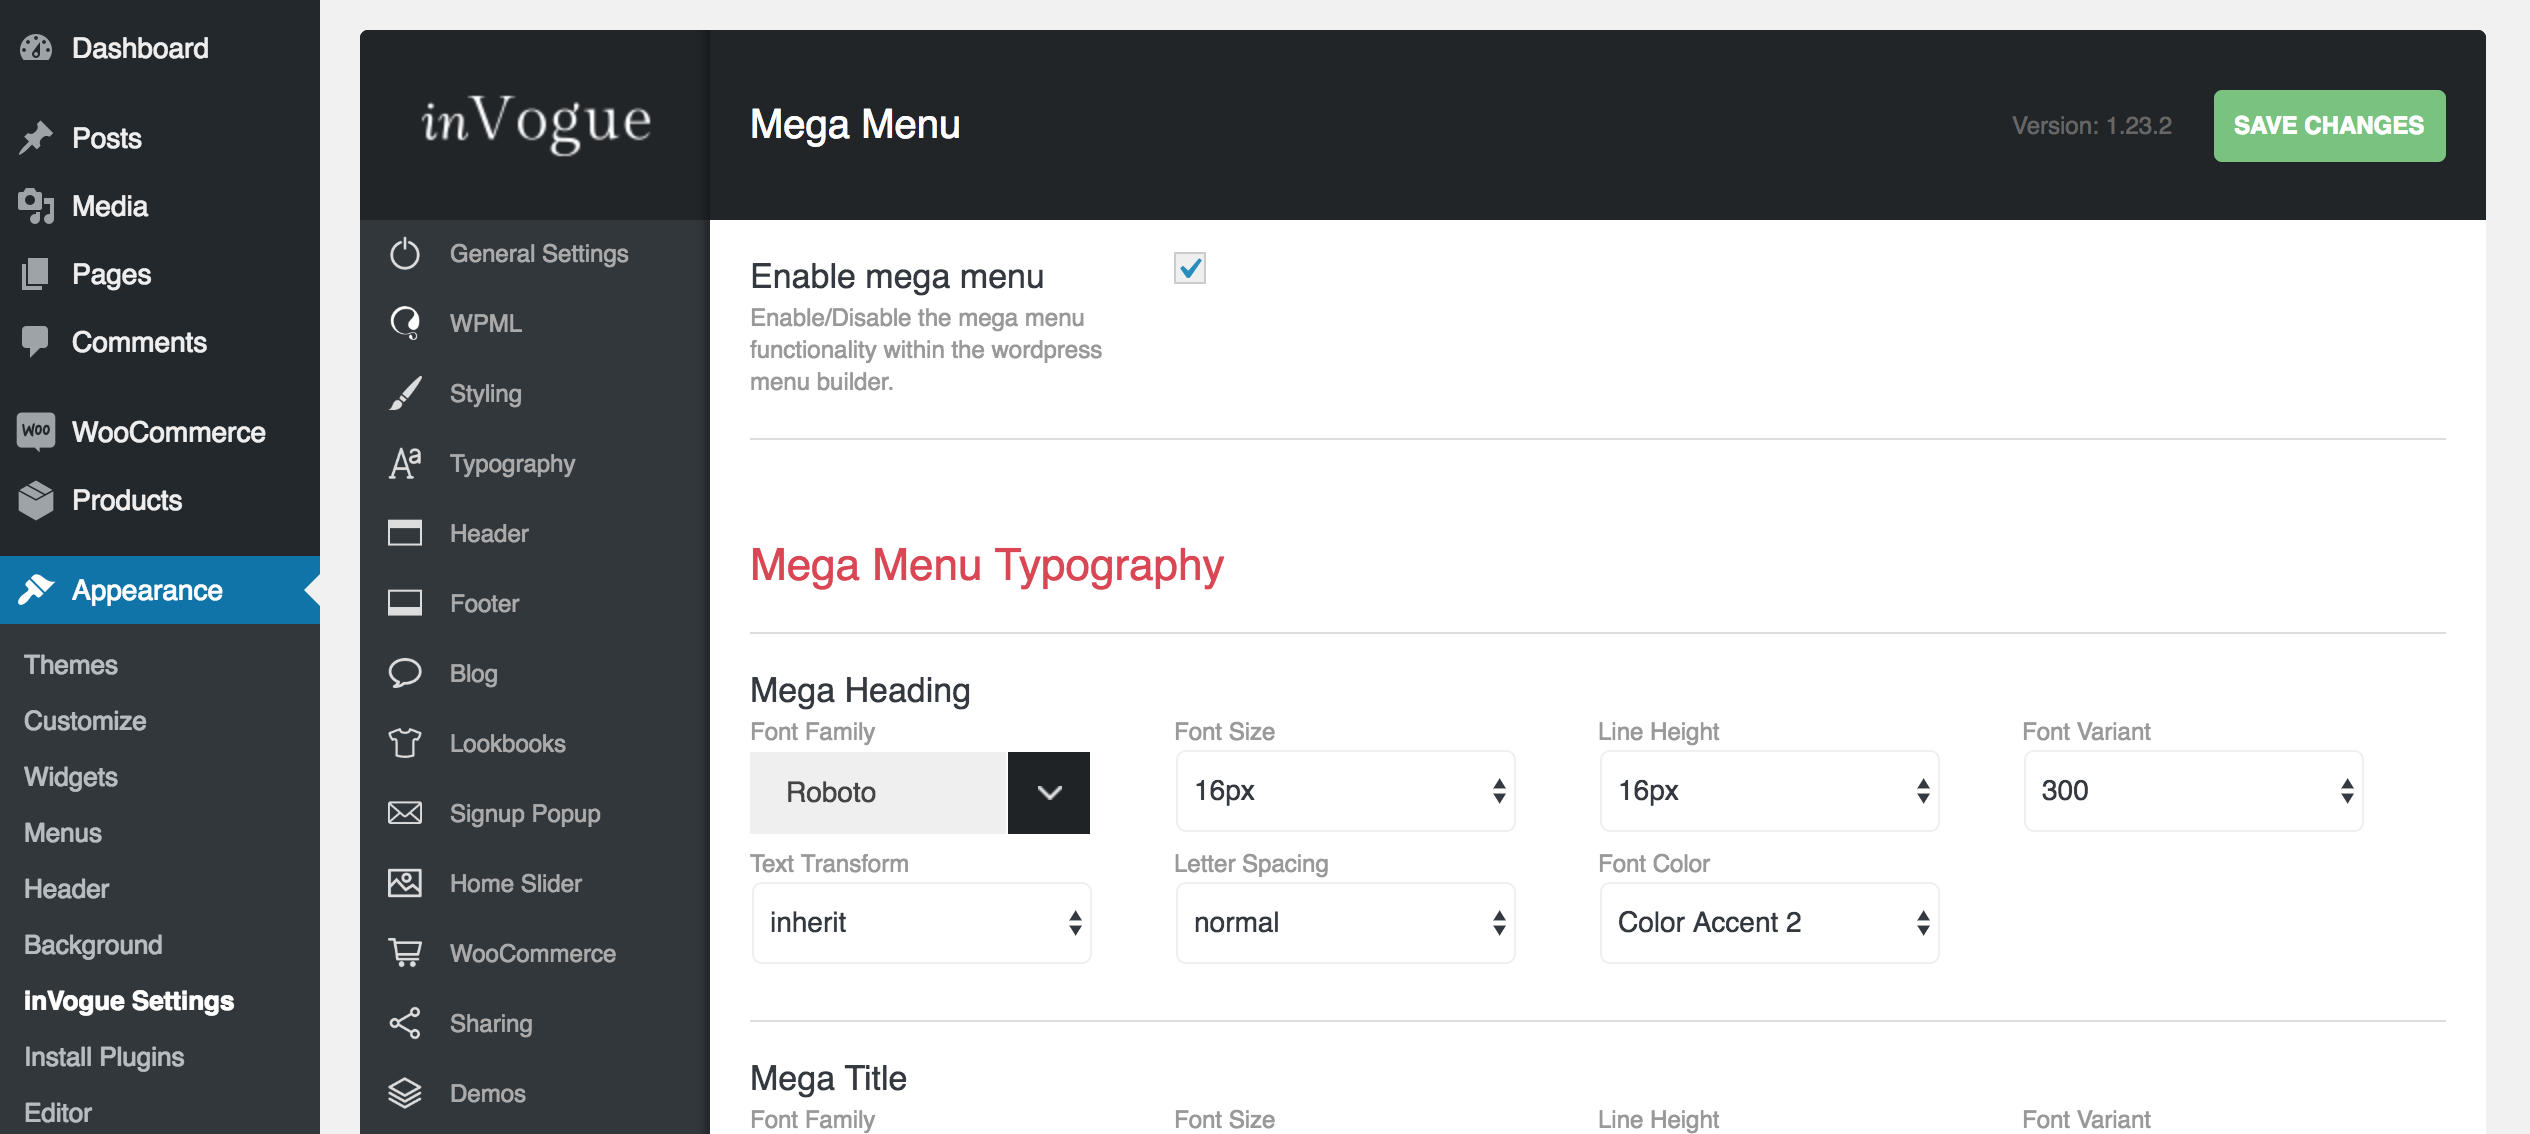
To begin creating a mega menu you will first need to enable the mega menu option from the inVogue settings. This can be done on the 'inVogue Settings > Mega Menu' tab by ticking the ‘Enable mega menu’ checkbox. Remember to save changes.
* Note that font options for the mega menu can also be set on this tab

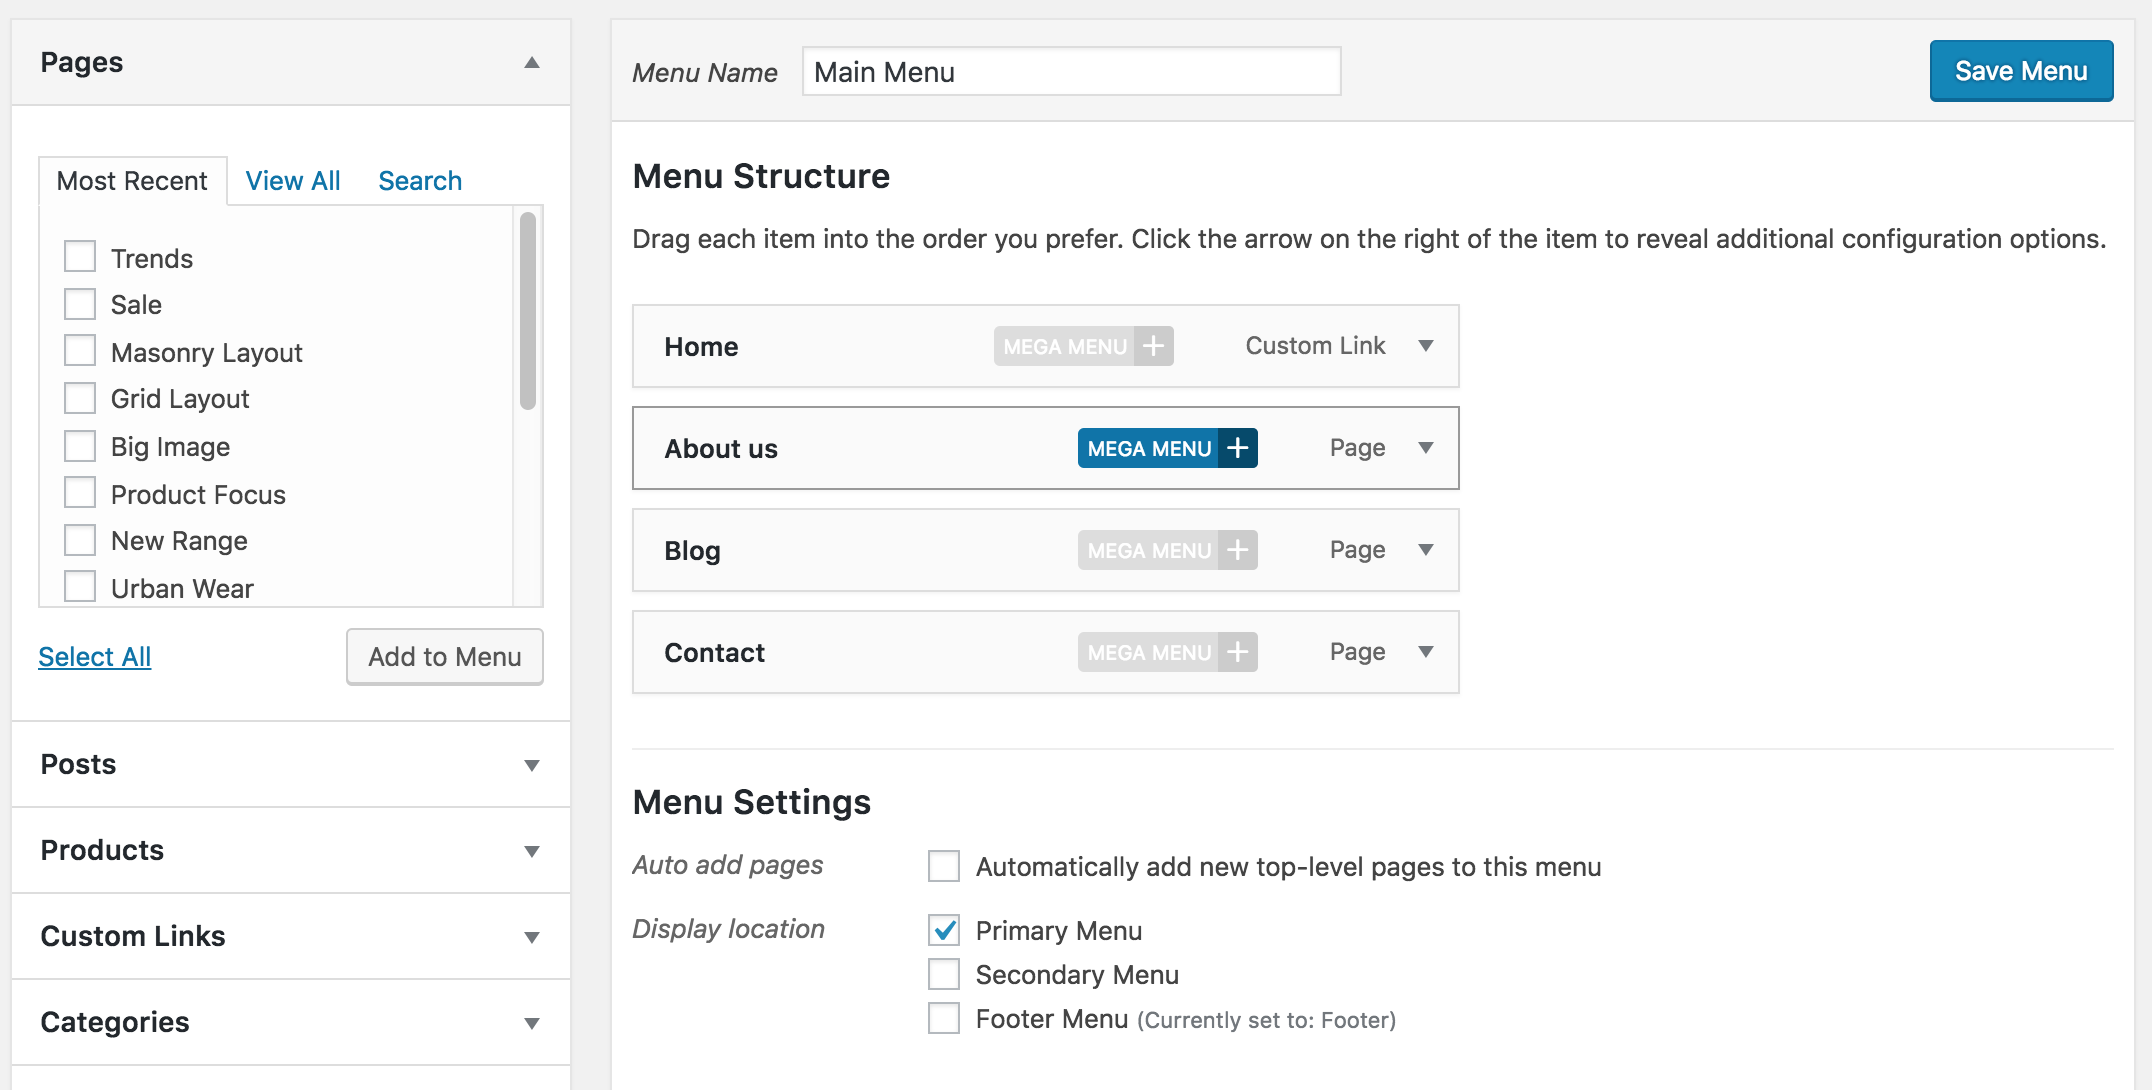
Once the option has been enabled and saved you can navigate to the ‘Appearance > Menus’ page to create and edit your mega menus. You can add a mega menu for a particular link by clicking the 'Mega Menu' button on the link tab.

From the new 'Mega Menu Settings' popup you'll be able to set the contents of the mega menu. On the initial 'Content & Layout' tab you'll be able to set the number of columns used for the mega menu and set the content for each column. The content options provided are 'Posts', 'Pages/Custom Links', 'Plain HTML' and 'WooCommerce Products'.

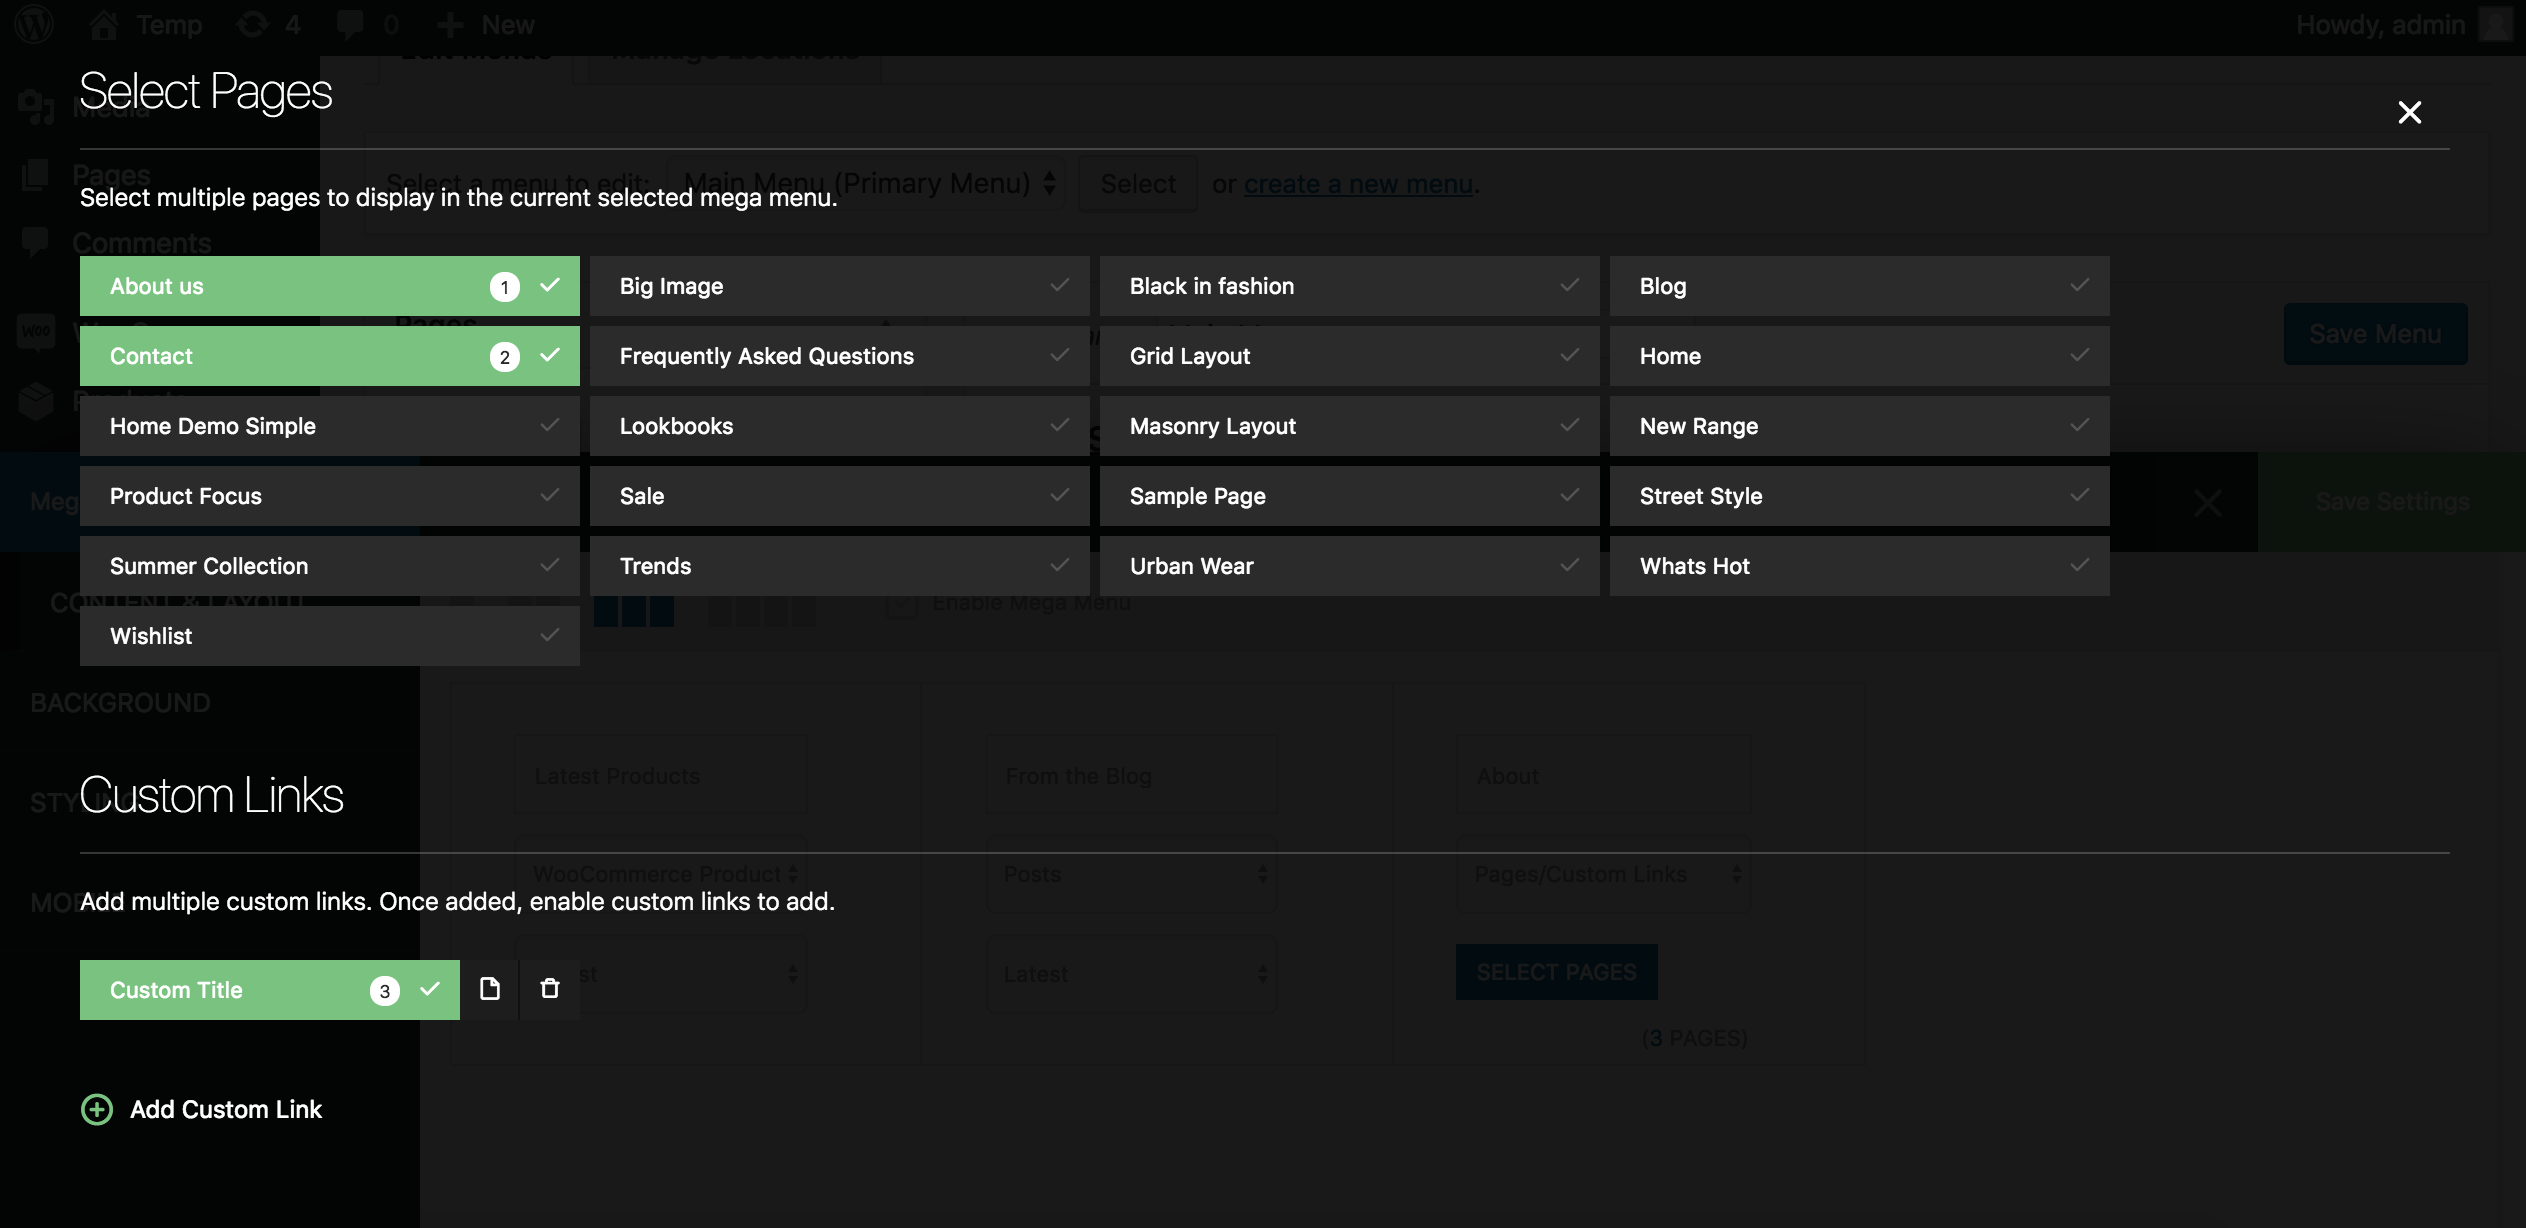
When using the 'Pages/Custom Links' option clicking the 'Select Pages' button will open a new popup which will allow you to select already published pages or add in custom links. This is shown in the screenshot below.

From the 'Background' tab you'll be able to set a background image or background color for the mega menu and overwrite the primary and secondary font colors.

From the 'Styling' tab you'll be able to:
- Enable/disable the 'Title underline' and set the color
- Enable/disable the border and set the color
- Enable/disable the shadow and set the color

From the 'Mobile' tab you will be able to set if the mega menu drop-down should be visible on mobile.

Once you have set the content and styling options for the mega menu you can enable the mega menu from the 'Content & Layout' tab by clicking the 'Enable Mega Menu' button and saving your changes. This allows for disabling/enabling a mega menu without losing your content, a disabled mega menu will retain its settings but not be displayed on the site front end.
