The contact page used within our demo can be easily re-created through the inVogue demo import option.
Please note that doing this will overwrite any existing content on that page so its advised to first create a new blank page
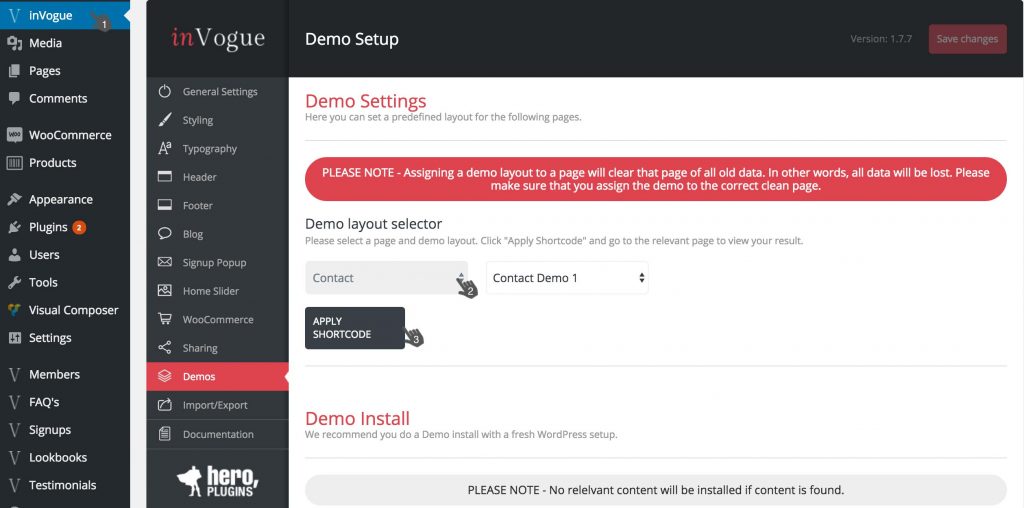
From the WordPress admin menu navigate to the inVogue settings page and then to the Demo tab. From here you will have the option to assign the structure of the contact page to any already existing page. From the drop downs below the ‘Demo layout selector’ heading first select the page you would like the structure added to, in this example the page is named ‘Contact. From the second drop down select the ‘Contact Demo 1’ option to use the same structure as our demo page. You can then click the ‘Apply Shortcode’ button.
Note that this will create the structure of the page for you but will not use the same content as on the demo page. Sections will be added in but it would still be necessary to add in the correct content.
Once the shortcode has been applied, on the inVogue settings page, you can navigate to the page to which the structure has been assigned to. From here you will be able to update the content on the page as required, i.e. setting the map pin location and contact information.
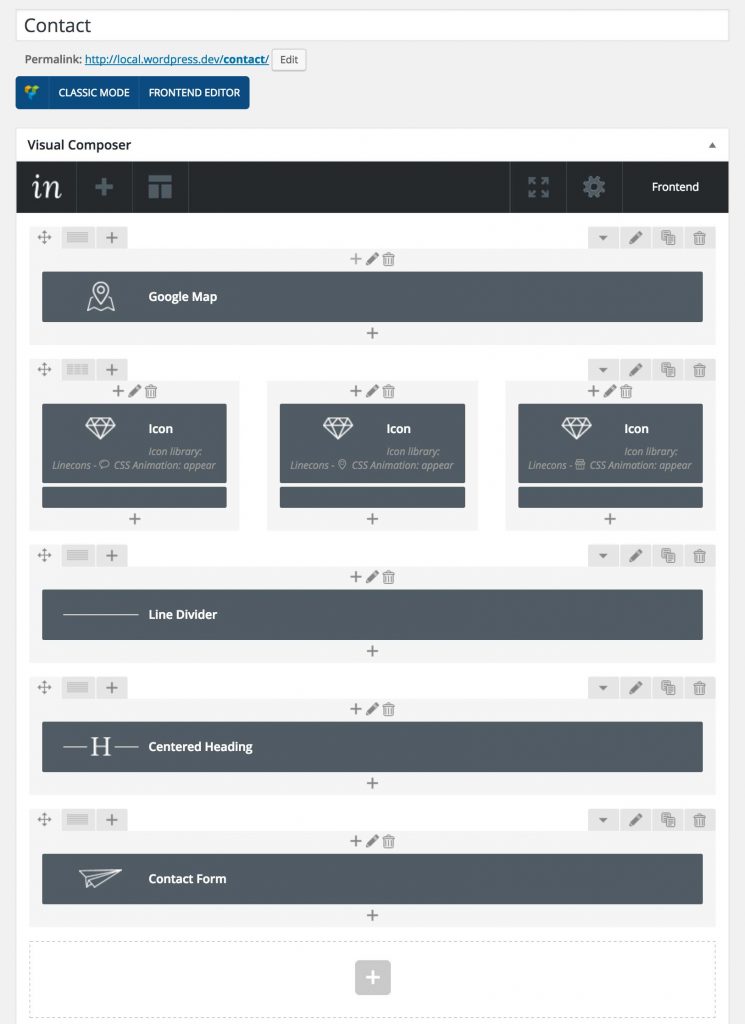
The page composer elements used for this page are, in order from top to bottom;
- Google Map
- 3 x Icon and Text elements
- Line Divider
- Heading
- Contact Form
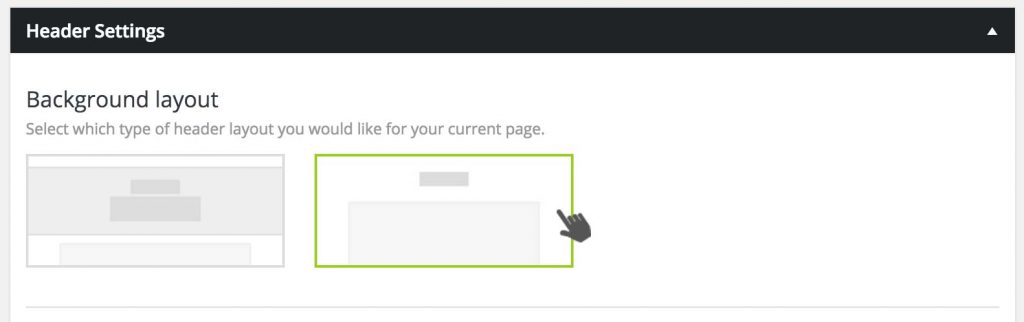
From below the page content section, within the ‘Header Settings’ section you will need to choose the second ‘Background Layout’ option.